WWII: Maginot Line | Normandy | V-Weapon Sites | Arnhem
Further afield: Crete
| Home Tracing Military Ancestors Travel Advice CWGC Cemeteries Iron Harvest News Book Reviews Glossary Links Contact Me Ypres:
 
|
The Third Battle of Ypres (July to November 1917)
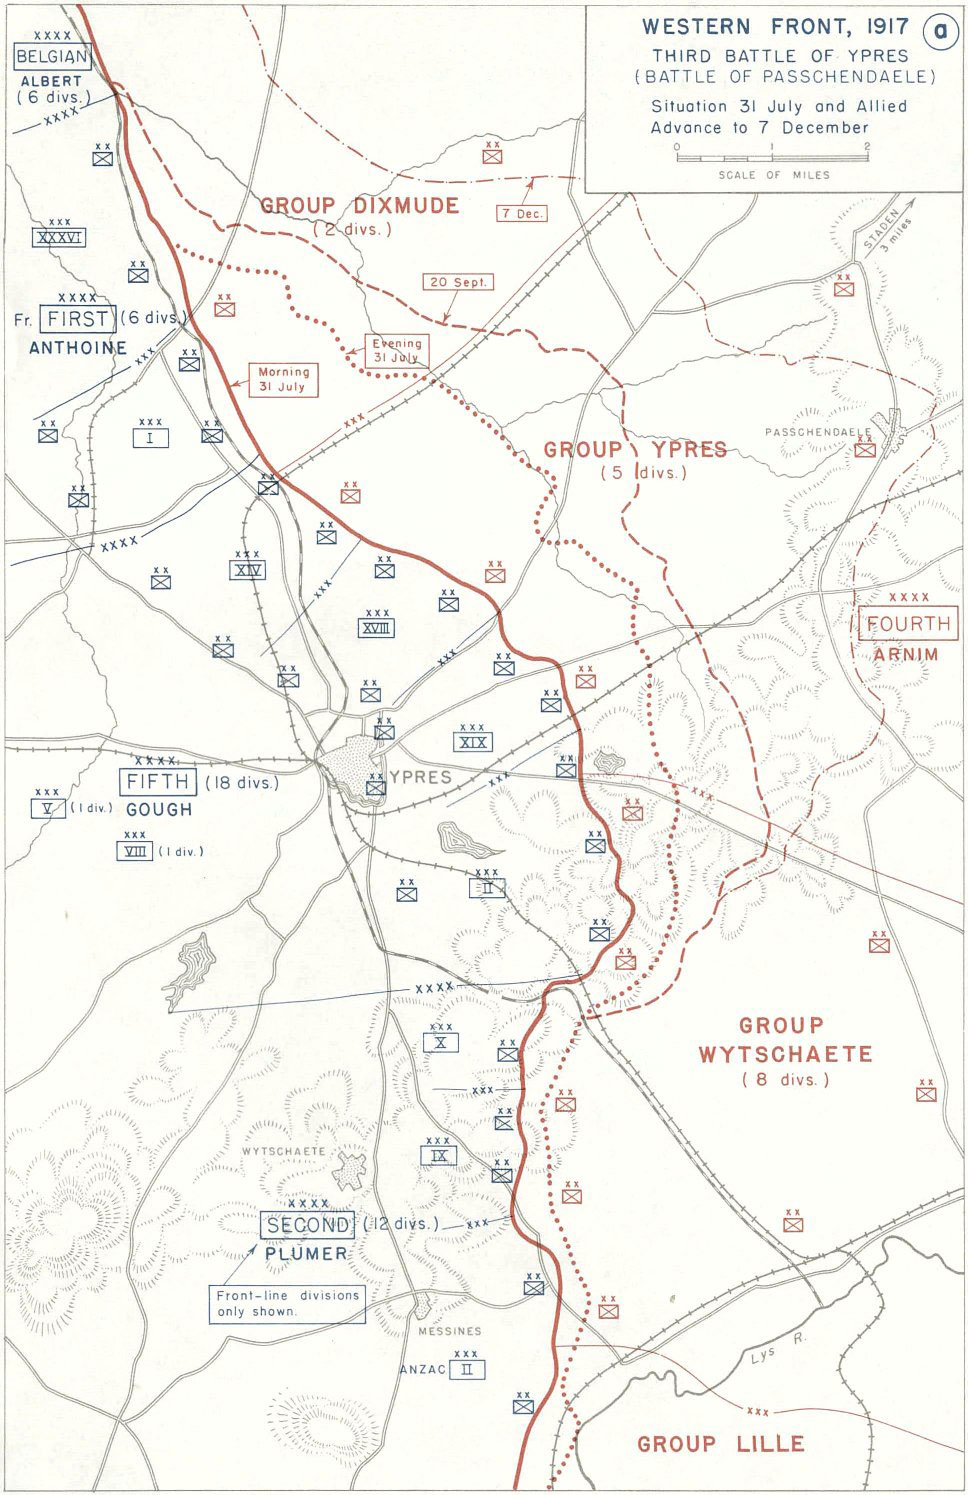
No Allied battle of the First World War has attracted as much controversy as the Third Battle of Ypres, or, as it is better known, the Battle of Passchendaele. In the years since the conflict it has been often used to support the "lions led by donkeys" concept – the valiant Tommy, sent over the top to his inevitable death in the quagmire of the Passchendaele Ridge by heartless generals quartered in chateaux miles behind the lines. The image is strong and, despite much recent revisionist writing, a seductive and enduring one. The Third Battle of Ypres was not actually a single battle but a series of engagements across the northern half of the Salient. It began with the Battle of Pilckem Ridge on 31st July and ended with the Second Battle of Passchendaele on 10th November 1917. Between them were fought seven further officially recognised battles, all launched with the aim of getting the British up onto the ridgeline and beyond. Unfortunately, a number of factors combined to make the offensive doomed from the start. Firstly, the guns that had been sited for the Battle of Messines, took time to haul into new positions for the offensive in the north, giving the Germans time to recover their balance. They built new defensive structures on the approaches to the ridge, including new concrete pillboxes, packed with machine guns and protected by barbed wire. Secondly, the amount of activity in the Salient in preparation for the assault could not be hidden from the Germans, indeed many senior Allied commanders and politicians had already “lifted the lid” on the offensive by publicly disapproving of it.
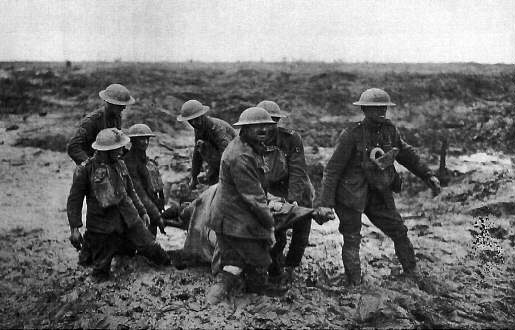
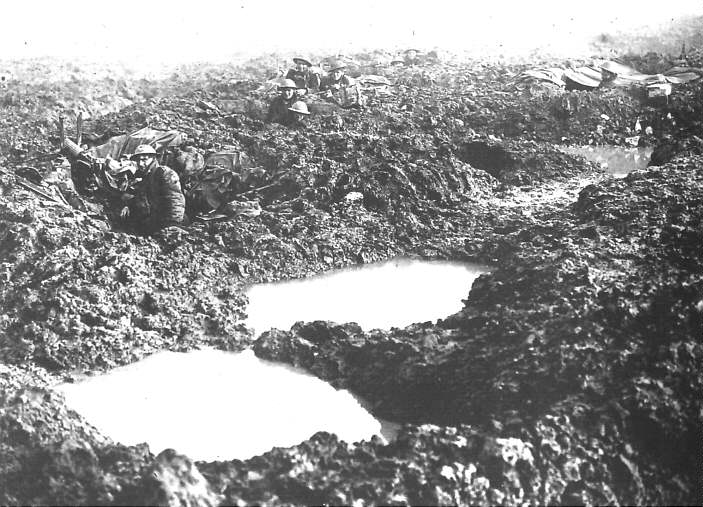
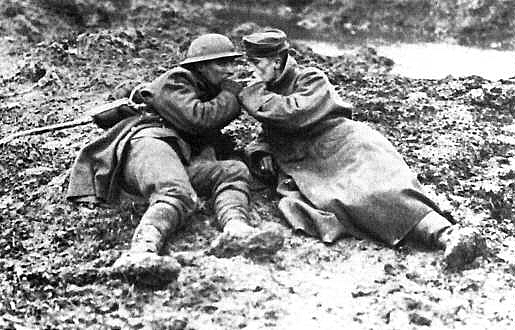
Lastly, and perhaps decisively, the ground over which the British infantry would have to fight was treacherous. Two and a half years of fighting and a weeklong bombardment prior to the assault by over 3,000 guns had destroyed the drainage system and turned the fields into muddy wastelands. More than anything else it was to prove the plan’s undoing. Yet the Third Battle of Ypres, Haig’s grand strategy to break the German line in the north, began well. By the end of the first day, the twelve assault divisions, around 100,000 men, had captured Pilckem, Frenzenberg, Hooge and Sanctuary Wood (Tour Guide – Sanctuary Wood). Soon, however, the ground and weather began to play their part. Tanks were used along the Menin Road, but the soft ground and obstacles slowed their advance and they became victim to German artillery – 17 were lost in an area that became known as the "Tank Graveyard". Then, in the afternoon, it started to rain and, within a few hours the Salient was beginning to resemble a swamp. For the next four days the downpour continued, limiting movement and taking the heat out of the British attack. German counter-attacks slowed the offensive even further, and with intermittent rain and drizzle continuing throughout August, the advance ground to a complete halt. Fighting broke down into a series of bitter hand-to-hand engagements as small pockets of men, soaked to the skin and wallowing in mud, battled for their lives. As it became clear that the plan was unravelling, an air of gloom and despondency began to descend on the British and Empire troops.
There was pressure on Haig to abandon the offensive altogether but, believing that the Germans were weakening under the constant attacks, he was determined to continue. He did, however, change tactics and commanders and brought up General Plumer’s Second Army to renew the attack along the Menin Road to try and break through to the Gheluvelt Plateau – the link between the northern and southern parts of the German defences around the Salient. The Battle of the Menin Road began on 20th September with an awesome artillery bombardment. It surprised the Germans, who, after their successes in halting the attacks of August, felt the British may have called off the offensive. The weather was also much improved – the rain that hampered the August attacks had tailed off during early September and the ground had dried considerably. This had the consequence of making the British artillery that much more effective as shells burst on impact rather than burying themselves in the cloying mud. The assault divisions made excellent progress. German trenches were smashed under the weight of gunfire. Some of the defenders fought on, but most were overwhelmed. Nonneboschen Wood, Glencourse Wood, Inverness Copse and part of Polygon Wood were all taken – features that had been held by a determined enemy for weeks fell in a matter of hours. On 26th September, the British attacked again. This time the remainder of Polygon Wood and the shattered ruins of Zonnebeke village were captured. On 4th October, a third great push took Broodseinde, Gravenstafel and part of Poelcapelle. The Passchendaele Ridge was nearly in Haig’s grasp.
Despite these successes, however, casualties were mounting, German counter-attacks were growing in intensity and, on the afternoon of the 4th, it began to rain again. This time the rain was persistent and the battlefield filled with water. Shell holes oozed with mud, polluted by the decomposition of thousands of unburied bodies. The wounded lay in agony for hours waiting for stretcher-bearers to reach them across the morass. That Haig continued the offensive under such conditions has been much criticised, both then and since. His options, however, were restricted. The British troops on the slopes of the ridge were extremely exposed and vulnerable to counter-attack, sited as they were in temporary positions, and a retreat to the July front line after so many casualties was out of the question. Further attacks went in on the 9th, 12th and 22nd October but met with only limited success. On 26th October, following a few days of clear weather, the Canadian 3rd and 4th Divisions, inching up the Bellevue spur, fought their way through a series of blockhouses and machine gun posts to leave themselves within assaulting distance of Passchendaele village itself. The weather broke again on 30th October as the Canadians, supported by the Royal Naval Division, tried desperately to reach the crest. Eventually, on 6th November, after a few days of drier weather the village and the top of the ridge were captured. Ypres disappeared from German view for the first time since 1914 (Tour Guide – Tyne Cot CWGC, Passchendaele).
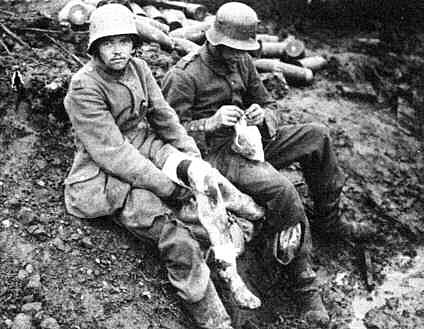
The cost in human lives had been staggering. Thirty-five men had been lost for every metre gained – 300,000 British, Canadians, Australians and New Zealanders were casualties, about a third of whom were dead or missing in the Flanders mud. The Germans too had suffered enormous casualties, but they had fresh troops coming. A month after the Canadian Corps took the Passchendaele Ridge, the Russians agreed an armistice and by the end of the year the first of a million German reinforcements began to entrain for the west. The high ground that had been won at such cost would be lost within a few months. It is with some justification that many have pointed to the terrible ordeal of Third Ypres as, ultimately, a tragic waste of human life. |